The Mystery of the Wet “Wet Bar”
Shaun, being a good landlord, called me about a problem in a rental unit that he has. His tenant reported that the cabinet under the sink of the wet bar was wet. A leak. Some of their stuff was messed up. Mold and all of the things that happen when you do not realize you have a slow leak or constant drip over time.
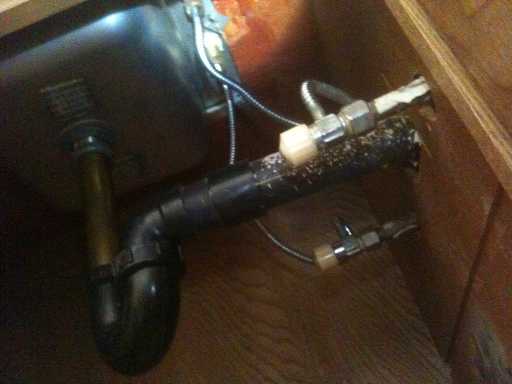
This apartment is easily 20 or more years old to give an idea of the vintage. Nice tile top on this wet bar but the lower part of the cabinet is made of particle board as many cabinets are these days. The tenant had turned the water off to the sink from the inlet valve so things were starting to dry out and I could find no obvious leaking when I arrived and began inspection.
I began by touching all of the pipes, valves, supply ines, connections and anything that could be the source of the leak. Everything was dry as a bone. I then turned the water back on at the supply valves and checked again, and again, everything was dry.
Next I turned both hot and cold water on at the sink full force and let it run and drain. Still I could find nothing leaking anywhere. Continuing to let the water run I then took some tissue and began to use it to touch every possible source for a leak since my hand is not as sensitive to tiny amounts of water. It began to seem as if the problem had magically repaired itself since I could still detect not even the slightest bit of moisture any where. However I know from past experience this is NEVER the case.
Next I began to gently move the pipes, lines and valves a bit. The tenant suggested that perhaps she had bumped the pipes with the big cardboard box of stuff that was previously stored there. Yet again, no leaks.
 I turned the water off at the sink and let the pressure build up in the lines, turned it on again, rechecked using tissue paper to detect moisture, and STILL nothing. Then I started turning the hot water inlet valve on and off. This was the valve that was off when I arrived. I thought it unlikely, but perhaps if there was a problem in the seat of this valve minerals in the water could build up and re-seal the leak. At first, nothing wet. Then, there it was. Working the valve had loosened the mineral deposits in the valve and slowly the drip began to appear from the handle of the valve. Pretty soon it was a steady, constant drip.
Now that the source of the leak was isolated, the next thing to do was to correct the problem and make repairs. But as in so many things, “Easier said than done”. First I got a good quality supply valve and line at the nearest hardware store. Shut off the main water supply to the apartment and then took apart our leaky valve from the line in under the sink and removed the supply line to the sink. I installed the new parts and turned the water main on and tested for leaks.
No leaks, but Uh oh, no water flow from the hot water, either. I made certain that the new valve was turned on. Now THAT was odd. I’ve done this countless times in the past without a hitch.
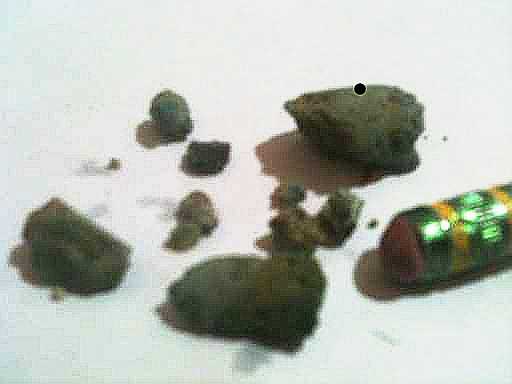 I decide to take things apart and examine them. And lo and behold, when I removed the new valve and looked closely inside it there were what looked like tiny rocks. Then I took my flashlight and looked inside of the 1/2″ supply pipe and saw that it was plugged solid. I began carefully chipping away with a small screwdriver, removing chunks until the inside of the pipe seemed clear. (Note: for size reference see the end of the pencil in the photo) Some fell back into the pipe out of reach of my tool so I reassembled everything, turned on the water to force things back into reach, turned off the water, and took things apart again. This time I was able to get all of the chunks you can see in the picture out of the pipe and make certain it was clear. When I reassembled everything again all flow was normal. There are two likely causes for this build up. Minerals in the 20+ year old hot water heater building up, or, a chemical reaction between newer copper pipe connection to older galvanized pipe connection.
However, now the COLD water valve was leaking from the same spot. So I replaced that valve and supply line also, after making sure that the copper supply pipe was clear. It was. New parts, all dry and ready to move on.
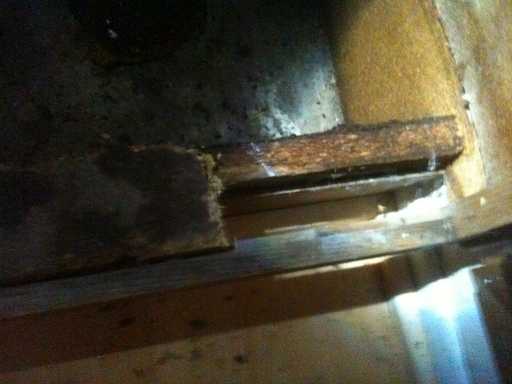 Now it is time to repair the cabinet. I remove all of the damaged particle board which has turned into mush. Luckily only half of the cabinet floor is damaged. I determine that there is a support that I can cut the floor back to in the center of the cabinet and cut at that point front to back. to make a square for the new floor to be installed into.
 I then cut and attach 1″ X 1-1/2″ flat stock to the perimeter of the inside of the cabinet, 1/2″ below where I want my new floor surface to sit,c so that it will match the remaining existing floor. I can then secure the new floor section to the ledger knowing that it will hold as much weight or more as the original floor.
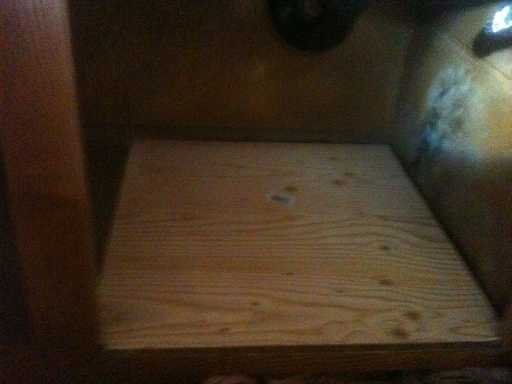 Finally I place and attach the 1/2′ thick plywood panel on the ledger for the new floor, and secure it. Old floor and new floor heights match up, clean cut and joint lines. Later if the land lord or tenant wants, tile or linoleum can be placed so that it is a beautiful and waterproof surface.
There is just a bit of surface mold on one side wall (not the bad kind) that I use bleach and a rag to wipe down and remove. All clean and though not like new, all of the materials that I have used are better than original.
